|
Print Only

What: Use this project to pre-print discs before burning or print already burned discs.
Recommended for: Print only is often used to save production time when event content is created and it is necessary to quickly produce a final disc for sale at the end of the event.
How to:
Step 1: Select Other Project from the Starter Window or the New Project Panel. An Other Project sub menu will be displayed. Choose Print Disc. Step one of the Print Disc wizard will be displayed.
| Step 2: Select the print label file by clicking the select a label button. Click here for more complete information about the Add a Print file window. When you have selected print label file, click the next arrow. |
|
Step 3 : Verify information on the summary window, choose the number of copies and click Go. Click here for more information about Print Disc Project Options
|
|
Once the job starts the Publisher Status window will appear. Here you can view the status of the printer, the robot, and the drive. You can also view a log of all activity. For more information visit the Publisher Status help document.
 |
Trouble Shoot Print Only Project
 |
For troubleshooting tips on this subject please search our Knowledge Base.
Create a Disc Image
Step 1: Select Other Project from the Starter Window or the New Project Panel. An Other Project sub menu will be displayed. Choose Create a Disc Image. Step one of the Create a Disc Image wizard will be displayed.
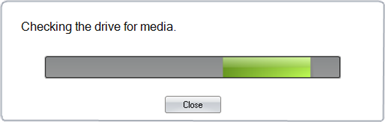
Step 2:After checking the drive for media, you will be prompted to place the disc you would like to image into the drive inside the Disc Publisher. The tray door will open automatically. Place the disc in the drive and click Close.
If you want to use a different drive as the Source Drive, click the drop down arrow and choose the appropriate drive. PTPublisher will check for media in this drive. If no media is present it will open the drive.
Step 3: The disc information will be read by PTPublisher and displayed on the Drive Properties section in the center of the window.
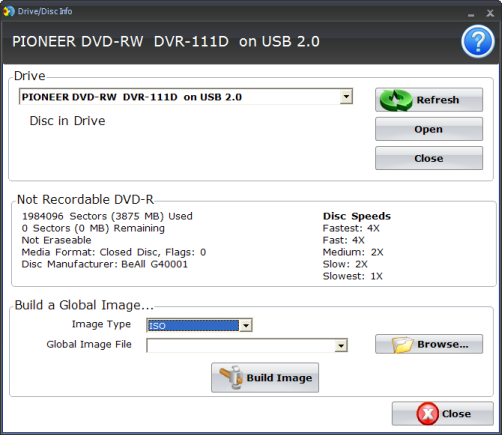
Step 4: Choose your image type. GI is the proprietary image format for PTPublisher and is the best choice for images that will only ever be burned in PTPublisher. Choose ISO if you would like to have the option to burn the image in other burning programs or if you would like to protect a DVD Video image using PTProtect.
Step 5: Click Browse to choose a location for your image.
Step 6: Click Build Image to start the job.
Once the job starts the Publisher Status window will appear. Here you can view the status of the printer, the robot, and the drive. You can also view a log of all activity. For more information visit the Publisher Status help document.
|
Trouble Shoot Create Global Image Project
|
For troubleshooting tips on this subject please search our Knowledge Base.
Burn Discs from Image
What: The Burn Discs from Image project allows you to copy any CD or DVD master. This job type has two phases. First, you must create the image by reading a master disc and saving it to your hard drive in the Global Image format (*.gi). Use the Create a Disc Image to achieve this. Second, you must set up a Burn Discs from Image project by selecting the image that you saved in the global image format.
Recommended for: All CD or DVD types (Audio CD, Data CD, Software Install Disc, Video CD, DVD, DVD-ROM, etc.) This procedure is useful when you need to make several copies of the same disc and you do not want to read your master at the beginning of every job. Also, by having the Global-Image file stored on the hard disk, you may access the source disc immediately.
How to:
Step 1: Select Other Project from the Starter Window or the New Project Panel. An Other Project sub menu will be displayed. Choose Burn Discs from Image. Step one of the Burn Discs from Image wizard will be displayed.
| Step 2: Click the "Browse" button to open a browse window to choose your global image file. If you have not yet created an image file, follow the steps for the Create a Disc Image project. |
|
Step 3: Use the Look In drop down, Favorites, Browse or Find Tabs on the top of the left pane to find the GI file. (See below for more information on these tab option) Double Click on the file to add it to your project. Once you have selected the items, click the Add files to Project button. When you are finished, click Done to close this window. Skip to Step 4
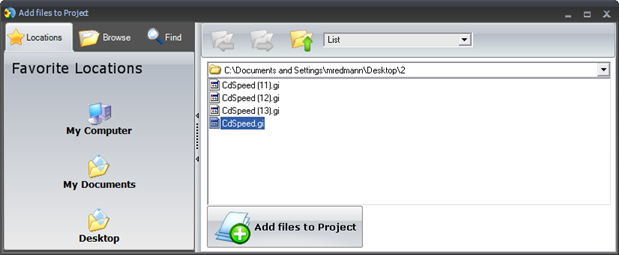
Locations. Click on the Locations tab to display favorite locations such as Desktop, My Documents or My Computer.
Browse. Click on the Browse tab to display files in tree view on the left side of the screen. Open and close folders by clicking the + or - next to each folder. Click on the folder to view the contents on the right side of the window.
Find. Click on the Find tab to search for audio files. Type in all or part of a file name to search for any audio file that matches. All Global Image files matching the typed criteria will be displayed.
| Step 4: Select the print label file by clicking the select a label button. Click here for more complete information about the Add a Print file window. When you have selected print label file, click the next arrow. |
|
Step 5: Verify information on the summary window, choose the number of copies and click Go.
|
|
Once the job starts the Publisher Status window will appear. Here you can view the status of the printer, the robot, and the drive. You can also view a log of all activity. For more information visit the Publisher Status help document.
|
Trouble Shoot a Global Image Project
|
For troubleshooting tips on this subject please search our Knowledge Base.
|
