| Overview: Selecting a Label file to print. |
 |
For any job type you choose you will be prompted to select a label file to print. You may select an existing label, create a label or choose to print nothing. Simply click the next arrow to print nothing on the disc. Otherwise follow the steps below.
 
| Select a Label |
|
Step 1: Click the Select a Label button to open a browse window to choose your print file. Use the Favorites, Browse or Find Tabs onthe bottom of the left pane to find the print file or click the Look In drop down to find the file.
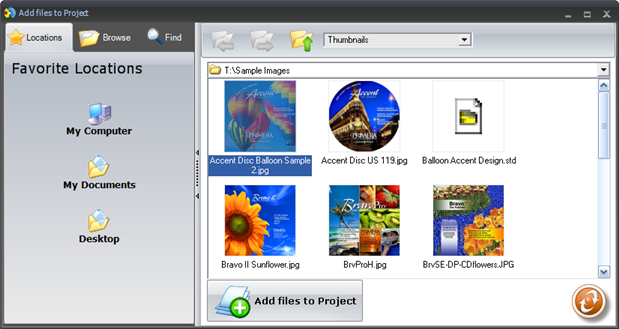
Step 2: Double Click on the file to add it to your project. You may add any BMP, JPG or SureThing (.std) file. SureThing files are automatically formated correctly. BMP or JPG files should be 4.72" x 4.72" square. For best print quality the image resolution should be atleast 300 dpi. Once you choose your label a preview and other options will be displayed. Skip to Step 3
To find the print file you may also click on the tabs to browse in explorer mode or search for files. Below is a description of each of the search types. Hover your mouse over each tab on the screen capture above to view the contents of that tab.
Locations. Click on the Locations tab to display favorite locations such as Desktop, My Documents or My Computer.
Browse. Click on the Browse tab to display files in tree view on the left side of the screen. Open and close folders by clicking the + or - next to each folder. Click on the folder to view the contents on the right side of the window.
Find. Click on the Find tab to search for print label files. Type in all or part of a file name to search for any picture file that matches. All JPG, BMP, GIF, PNG, TIF files matching the typed criteria will be displayed. Use the * modifier to search for specific file types such as *.jpg or *.std to search for all files ending those specific extensions.
| Create a Label |
|
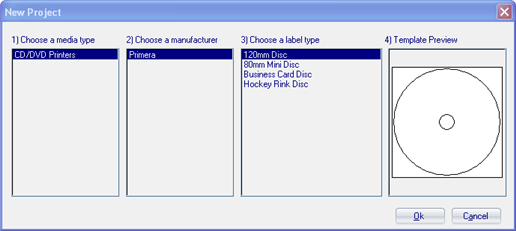
Step 1: Click the Create a Label button to open the SureThing CD Labler program. This program will allow you create a label.
Choose the 120mm DiscTemplate from the window that appears. (Business Card Sizes can only be used with a Bravo II, XR, Pro and XRP with in conjunction with a Business Card Adapter Kit - sold separately)
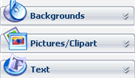
| Using the buttons on the left navigation window, you may add your own background, choose a pre-made background, choose from several text effects or insert a picture. Click the down arrow on the button to view all options. Once you have designed the label go to the file menu and choose save. |
 |
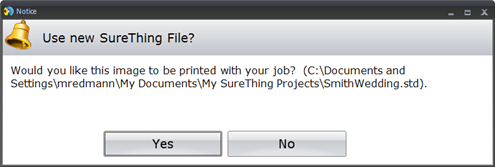
Step 2: Close the SureThing program. A message will appear asking if you would like to use the SureThing file you just created in your project. Click Yes to use it in your project. Once you choose your label a preview will be displayed.
Step 3: You can edit the print settings for this file by checking the use custom printer settings box and changing the settings that appear.
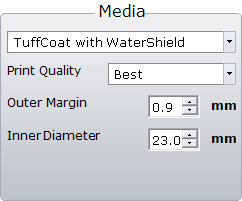
Several preset media types that correspond with the media availabe at our webstore can be selected the Media drop down box. When you select a media type from this box the Print Quality, Outer Margin and Inner Diameter are automatically adjusted to fit that media.
Choose "Use Driver Default" from the drop down to use print preferences set via Windows Printers and Faxes.
If you are not using media sold by Primera you can adjust these settings by changing the quality setting or toggling the size of the outer margin or inner diameter. You can save your adjusted settings by clicking Save my Media. You will be prompted to name your custom media settings. This name and the associated settings will now be availabe to choose in the media drop down box.
| Step 4: Click the next arrow to move the the next step. |
|
 |
Trouble Shoot Printing Problems
 |
For troubleshooting tips on this subject please search our Knowledge Base.
|
